


Plumbing installation is the process of planning, installing, connecting, and testing the pipes, drains, vents, valves, and fixtures that supply clean water and carry wastewater away from a building. In a new home, that work usually moves through design and permitting, underground installation, rough-in, fixture installation, testing, and final inspection. This guide explains what happens at each stage, what affects cost, and what homeowners should confirm before the work begins.
Key Takeaways
-
Plumbing system is a hidden network of pipes, valves, fixtures, drains, vents and sometimes gas lines that brings in clean water and removes waste.
-
Household leaks commonly develop at worn toilet flappers, dripping faucets, leaking valves, and pipe connections; unexplained water use or visible moisture can signal a leak that needs investigation.
-
The two core building plumbing systems are the pressurized water-supply system and the gravity-based drain-waste-vent system. Storm drainage and fuel-gas piping may also be present, but they serve separate functions and are governed by their own local requirements.
-
Good plumbing design sizes and routes pipes for fast hot water, respects local codes and permits and makes future maintenance and troubleshooting easier.
Plumbing installation affects water safety, drainage performance, code compliance, and how easily the system can be inspected and maintained. Much of the work is concealed behind walls, floors, or slabs, which is why required testing and inspections typically occur at defined stages before piping is covered.
What is a Plumbing System?
A plumbing system is a network of pipes, fixtures, and other apparatuses that transport water and waste in and out of houses and buildings. At its core, the system is designed to fulfill two primary objectives: to supply clean, potable water for drinking, cooking, and cleaning; and to remove wastewater efficiently, thus maintaining a hygienic and sustainable environment.
The installation of a plumbing system is a complex process that involves careful planning and execution to ensure compliance with local building codes and standards. It typically starts with a detailed design that outlines the routing of pipes, the location of fixtures, and the integration of the water supply and drainage subsystems.
Plumbing Installation Codes
Plumbing installation has broad codes and regulations that address various aspects of plumbing, from the materials used to the installation techniques. Here are the crucial codes often emphasized for every plumbing system installation:
-
- Backflow Prevention Codes: These are critical to prevent the contamination of clean water supplies. Backflow prevention devices stop dirty water from flowing back into the freshwater supply, which is vital for maintaining public health.
- Sanitary Drainage Codes: These regulations ensure that waste is effectively removed from the building without causing blockages or exposing occupants to harmful gases. They cover pipe sizing, gradient, venting, and the materials to be used for effective waste disposal.
- Water Supply and Efficiency Codes: These codes ensure there is a consistent and safe delivery of potable water and promote water conservation through the use of efficient fixtures and fittings.
- Gas Piping Codes: Given the potential risks associated with gas leaks, these codes are stringent, covering the materials, installation, and testing of gas lines to prevent leaks and ensure safety.
- Ventilation Codes: Proper venting is crucial for maintaining water flow and preventing the buildup of harmful sewer gases within the building. Ventilation codes ensure that the plumbing system has adequate airflow to function correctly.
Inspectors review the work against the locally adopted code, approved plans, and the requirements for that inspection stage. Noncompliant work must be corrected before the affected work is approved or concealed.
For the most accurate and detailed information, professionals should refer to the specific plumbing codes applicable in their jurisdiction, such as the Uniform Plumbing Code (UPC) or the International Plumbing Code (IPC). These documents are updated regularly and can be accessed through their respective websites or local government building departments. Code adoption and amendments vary by state and local jurisdiction. Confirm the edition in force, local amendments, permit requirements, and required inspections with the authority having jurisdiction before work begins.
How Does Plumbing Work?
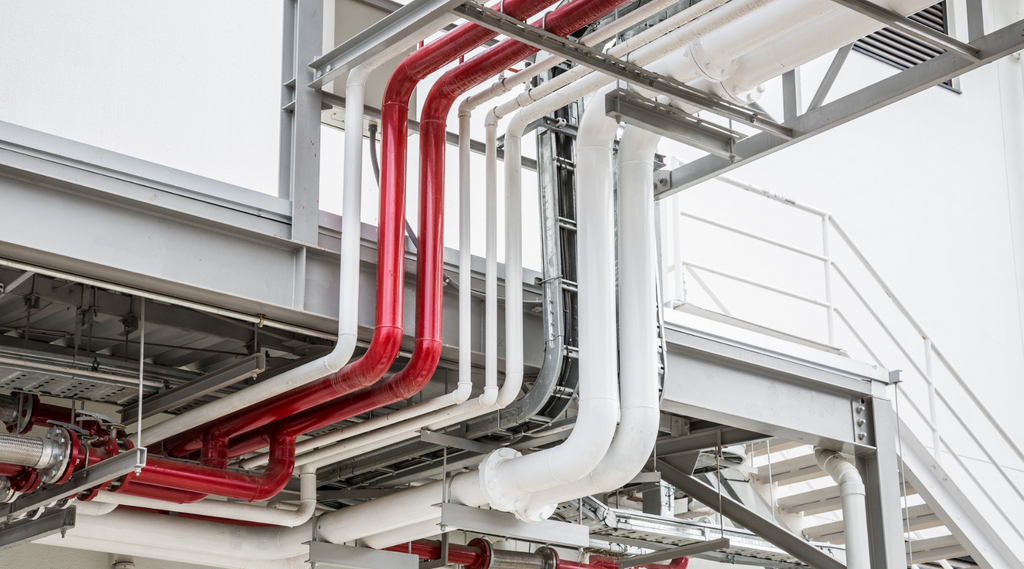
At the heart of plumbing is the principle of fluid dynamics, which explains how liquids behave and move under various conditions. Water, like all fluids, flows from areas of high pressure to low pressure. In a plumbing system, this principle is harnessed to move water through pipes. Pumps or municipal water supplies create the necessary pressure to push water through the system and into buildings. This pressure must be carefully regulated; too much can damage fixtures and pipes, while too little can result in poor water flow.
Water Supply System
The water supply system in a building is designed to overcome these challenges. It typically includes a main water line that carries water from the municipal system or a well into the building. This line splits into smaller branches, delivering water to various fixtures. The system is often equipped with valves and regulators to control the flow and pressure of water, ensuring that it is delivered efficiently to every part of the building.
Hot Water Delivery
Hot water delivery adds another layer of complexity. Water heaters, either tank-based or tankless, are used to heat cold water. Storage water heaters keep a volume of heated water ready for use, while tankless units heat water as it flows. Tankless models can reduce energy use compared with conventional storage units in some applications, but actual savings depend on hot-water demand, fuel type, efficiency, and system design. The heated water is then distributed through dedicated hot water lines parallel to the cold water lines.
Drain-Waste-Vent System (DWV)
The DWV system handles everything that happens after water goes down a drain. It carries wastewater out of the house and vents sewer gases so they escape safely outdoors. The drainage system works on the principle of gravity, allowing wastewater and sewage to flow down from fixtures into larger sewer pipes.
To do its job, the DWV system uses a few key pieces working together:
-
-
Drain Pipes: Carry wastewater away from sinks, tubs, toilets, showers, and appliances.
-
Waste Pipes: Vertical or horizontal sections that move sewage from toilets and high-flow fixtures.
-
Vent Pipes: Allow air to enter the plumbing system so wastewater flows without creating vacuum pressure.
-
Traps: The curved section of pipe under a fixture holds a water seal that helps block sewer gases. P-traps are common in modern installations. S-traps can lose that seal through siphoning and are generally not permitted in new work, so the trap type and venting arrangement must follow the locally adopted code.
-
Main Plumbing and Related Building Systems
Potable Water or Drinking Water Plumbing System
This system is responsible for delivering clean, safe water for drinking, cooking, and bathing. It encompasses the network of pipes that transport water from the municipal supply or a private well to various fixtures in the property. The system includes water meters, pumps, and pressure regulators to ensure a steady and reliable water flow that meets health standards.
💡Expert Tip
"Plumbers often compare the supply system to a system of arteries. If pressure drops, something is restricting flow; if pressure surges, something is stressing the lines."
Sanitary Drainage System
The sanitary drainage system carries wastewater from plumbing fixtures to a public sewer or an onsite wastewater system such as a septic system. Building drainage piping conveys the wastewater; treatment occurs downstream in the public wastewater system or, for a conventional septic system, in the septic tank and drainfield.
Storm Drainage System
Separate from sanitary drainage, a storm drainage system conveys rainwater from roofs and other approved collection points away from the building. Depending on the building and local requirements, components can include roof drains, gutters, leaders, storm drains, and storm sewer piping.
Optional: Water Conservation System
While not a standard component in every building, water conservation systems are an increasingly popular option in modern plumbing practices, especially in areas facing water scarcity or for those aiming to reduce environmental impact.
Where allowed by local code, graywater systems can collect wastewater from sources such as bathtubs, showers, lavatories, clothes washers, and laundry trays for approved nonpotable uses. Source definitions, treatment requirements, storage limits, and permitted end uses vary by jurisdiction, so the system must be designed to the locally adopted code.
Related System: Fuel-Gas Piping
Fuel-gas piping is separate from potable-water and drain-waste-vent plumbing, although plumbing contractors may perform gas-piping work where local licensing rules allow it. Its materials, sizing, pressure, testing, appliance connections, and installation are governed by the locally adopted fuel-gas or residential code and applicable utility requirements.
Plumbing Installation

Plumbing installation is a complex process that requires meticulous planning, execution, and adherence to codes. The table below gives you a quick look at each stage, the work typically completed, and what is checked before the project moves forward.
|
Stage |
Typical work |
Verification point |
|
Design and permits |
Layout, fixture schedule, materials, calculations, plans, and approvals |
Confirm required plans are approved, permits are issued, and applicable inspection requirements are identified before work begins. |
|
Underground work |
Building drain, sewer or septic connection, water service, sleeves, and below-slab piping as applicable |
Check routing, support, bedding, slope, materials, and required tests before covering |
|
Rough-in |
Supply, drain, waste, and vent piping installed in walls, floors, and ceilings |
Complete required rough-in tests and inspection before closing the framing |
|
Utility connections |
Connect the building system to the approved water source and sewer, septic, or other waste system |
Verify pressure, flow, drainage, and connection approvals |
|
Fixture installation |
Set and connect sinks, faucets, toilets, showers, appliances, and shutoff valves |
Check fastening, seals, clearances, operation, and leaks |
|
Final testing and inspection |
Test the completed system and correct deficiencies |
Obtain required final approval and retain records, warranties, and test results |
Project order varies with the foundation, utility arrangement, building design, and local inspection process. The plumber and building department should confirm the sequence before work begins.
Here's a step-by-step guide to understanding how professional plumbing installation unfolds:
1. Design and Planning
The process begins with a detailed design of the plumbing system, which includes the layout of plumbing lines, fixture locations, and the types of materials to be used. Licensed plumbers or plumbing designers also keep an eye out for special situations such as multi-story homes, slab-on-grade foundations, older framing, or long fixture runs. This plan should comply with local plumbing codes and regulations.
Once they have a good idea of what it's all gonna look like, your next question would probably be: “What will this cost me?”
For new construction, plumbing cost depends on the home’s size and layout, the number and type of fixtures, foundation type, pipe materials, local labor rates, permit and inspection fees, and the distance to water and sewer connections. Multi-story layouts, slab work, long fixture runs, specialty systems, and premium fixtures can raise the total substantially. Because published price ranges use different scopes and assumptions, use them only for early planning and get itemized quotes from licensed local plumbers before setting a project budget.
2. Obtaining Permits
Before any work begins, the necessary permits must be obtained from local authorities. This step typically involves submitting detailed plans and specifications for review by regulatory bodies. Permits ensure the planned work meets all legal and safety standards.
Permit type, required documents, who may obtain the permit, and the inspection sequence are jurisdiction-specific. Before work begins, confirm these requirements with the local authority having jurisdiction, including which inspections must occur before underground or rough-in piping is covered.
3. Installation of Underground Pipes
For new constructions, plumbing installation starts with laying the underground pipes before the foundation is poured. This includes plumbing lines for waste removal and water lines for the supply, requiring precise execution to ensure correct slope and alignment. Choosing the right pipe materials is critical, as repairs after building completion can be complex and costly.
Underground errors can be among the most disruptive plumbing problems to repair because accessing a failed line may require opening finished floors or removing nearby finishes and cabinetry. That makes material selection, bedding, slope, joint quality, testing, and inspection especially important before the slab or foundation work closes the area.
4. Rough-In Stage
Once the structure is up, the professional plumber performs the above-ground rough-in work, which involves installing pipes within walls and floors. This stage sets up the framework for the later installation of fixtures and appliances, with careful routing to accommodate the building’s layout and design. Pressure tests are often conducted to ensure no leaks are present in the pipes.
5. Connection to Water and Sewer Lines
After the rough-in is approved, the next step involves connecting the internal plumbing network to the municipal water and sewer systems or other external water sources and waste disposal solutions. For most homes on municipal utilities, the plumber connects to the city’s water service at the property line. If the home relies on a well, the connections are made to the well pump instead.
On the sewer side, the building’s drain line ties into the city sewer lateral or, in rural areas, the inlet of a septic tank. Once the connections are made, the system is tested again to confirm proper flow, drainage, and pressure.
6. Installation of Fixtures
After the building's interior is near completion, plumbers install fixtures like sinks, indoor & outdoor faucets, toilets, and showers. Fixture installation usually includes securing the fixture, connecting the water supplies and shutoff valves, completing the drain and trap connection where applicable, applying the required seals, and following the manufacturer’s clearance and fastening instructions. The plumber then operates each fixture and checks the supply and drainage connections for leaks.
Each fixture is carefully fitted and tested to ensure it operates correctly, with no leaks and proper water flow. Believe me, if this is rushed or done half-heartedly, you can be pretty sure you'll be dealing with the consequences and costly repairs later.
7. Testing and Inspection
After all pipes and fixtures are installed, the whole plumbing system should be tested and inspected before the job is considered finished. Testing may occur at more than one stage. Underground and rough-in work may need to be tested and inspected before it is covered, while fixtures and the completed system receive operational and final checks later. Required methods and timing vary by jurisdiction and system type.
If a leak shows up during testing or after you’ve moved in, you can ask the plumber to come back, fix it, and retest the system. Most reputable plumbers cover this in their warranty or contract, so read those terms and keep a copy for your records.
Common problems found during testing and final checks include small leaks at joints or fixture connections, incorrect drain or vent connections, inadequate drainage slope, loose fixtures, and components that cannot be accessed for service. The exact tests and inspection points depend on the system, project stage, and locally adopted code.
Residential vs. Commercial Plumbing Systems
The distinction between residential and commercial plumbing systems lies in their scale, complexity, and the demands placed upon them.
Residential Plumbing System is typically simpler, serving the needs of a single-family or multi-family dwelling with a consistent daily water usage pattern. These systems are designed to handle moderate use, with a limited number of fixtures like sinks, toilets, and showers. The design focuses on convenience, ease of use, and maintenance.
A Commercial Plumbing System, found in office buildings, shopping centers, schools, and industrial facilities, is more complex due to the higher volume of usage and the variety of their requirements. These systems must accommodate heavy, consistent water usage and manage significant waste disposal needs. They often include larger pipes, more sophisticated water heaters and boilers, and extensive sewage and drainage systems. Commercial plumbing may also need to support specialized equipment, comply with stricter health and safety regulations, and facilitate easier access for maintenance and repairs.
What is Important to Consider When Designing a Plumbing System?
When designing a plumbing system, several critical factors must be considered to ensure efficiency, compliance, and long-term reliability:
- Water Source and Quality: The water source (municipal supply, well, etc.) directly impacts the system design. Quality concerns, such as hardness, mineral content, and potential contaminants, must be addressed to determine the need for treatment systems like softeners or filters.
- Pipe Materials: Options include copper, PVC, CPVC, PEX, and others, each with specific properties affecting durability, cost, and suitability for different types of water and temperatures. The material selection should align with the water quality, usage demands, and environmental conditions.
- System Capacity and Demand: The plumbing system must be designed to meet the peak demand of the building. This involves calculating the simultaneous usage of all fixtures to ensure the system can deliver sufficient water volume and drainage capacity, avoiding overloads or inefficiencies.
- Energy Efficiency: Energy considerations are increasingly important in plumbing design, especially regarding hot water systems. Energy-efficient designs include properly sized water heaters, insulated piping, and potentially incorporating renewable energy sources like solar water heaters to reduce overall energy consumption.
- Compliance with Local Codes and Regulations: Adherence to local plumbing codes is non-negotiable. These regulations govern installation practices, materials, as well as design and marking systems to ensure safety, health, and environmental protection. Compliance avoids legal issues and ensures the system's reliability and safety.
- Water Pressure and Flow Rate: Adequate water pressure and flow rate are essential for the plumbing system functionality. These factors depend on the pipe diameter, system design, and elevation changes within the building. Designers must ensure that water pressure is sufficient to reach all fixtures, especially in multi-story buildings, without exceeding pressure limits that can cause pipe damage.
Plumbing System Maintenance
A well-maintained plumbing system depends on a few simple habits done regularly and paying attention when something feels “off.” The table below gives a quick checklist of plumbing system maintenance tasks, how often to do them, and the early signs that something may be wrong.
|
Task |
Frequency |
What to Do |
What to Look For |
|
Check for Leaks |
Monthly |
Inspect pipes, faucets, and toilets; feel around connections and shutoff valves. |
Dampness, discoloration, puddles, or slow drips around fixtures. |
|
Prevent Drain Buildup |
Weekly to Monthly |
Use sink strainers, remove collected debris, and follow the fixture or drain manufacturer’s care instructions. Avoid putting grease, wipes, or other unsuitable materials down drains. |
Slow drainage, recurring odors, gurgling, or repeated backups. |
|
Inspect Water Pressure |
Quarterly |
Test pressure with a gauge; run multiple fixtures at once to compare flow. |
Weak flow, sudden pressure changes, or sprays that seem unusually forceful. |
|
Check Water Heater Maintenance Needs |
At the manufacturer’s recommended interval |
Review the unit’s manual and warranty requirements. Arrange inspection, flushing, anode service, or other maintenance when specified for that model and local water conditions. |
Leaks, unusual noise, reduced hot-water output, discolored water, error codes, or corrosion. |
|
Check for Corrosion |
Seasonally |
Look over exposed pipes in basements, crawl spaces, or utility areas. |
Rust, flaking metal, green or white mineral buildup, or discolored water. |
It also helps to keep a few simple safety reminders in mind:
-
Know where the main shutoff valve is - and actually test it every now and then, just to make sure it's working.
-
If you suspect a gas leak, leave the area immediately and call 911 and the gas utility or pipeline operator from a safe location. Do not try to locate the leak or operate gas valves yourself.
-
If static water pressure exceeds the limit in the locally adopted code, have a qualified plumber evaluate whether a pressure-reducing valve is required. The IPC requires a regulator where building water pressure exceeds 80 psi static.
-
If you need to, install or keep up the backflow prevention devices where they're needed.
-
Inspect washing-machine hoses regularly and replace them if they are cracked, bulging, corroded, leaking, or otherwise damaged. Follow the appliance and hose manufacturers’ replacement guidance.
How to Drain a Plumbing System?
To drain a basic home water-supply system, start by following the instructions for the property’s water source, pressure equipment, appliances, and water heater. Shut off the main water supply. Before draining a water heater, shut off its electricity, gas, or other energy source as the manufacturer directs and allow hot water to cool. Open fixtures to admit air and drain water, working from upper levels toward the lowest approved drain point. Toilets, outdoor lines, wells, pressure tanks, boilers, fire-sprinkler systems, and multi-unit buildings may require different steps, so use the equipment manuals or a qualified plumber when the system is more complex.
How to Winterize a Home Plumbing System?
Winterizing a home plumbing system involves draining all water to prevent freezing and pipe bursts. After draining the system, shut off the water supply to outdoor faucets and use insulated covers to protect them. Apply insulation to exposed pipes in areas like the attic, basement, and garage to prevent freezing.
For traps or fixtures that require freeze protection, use only a product specifically labeled for plumbing or RV winterization and follow the product, fixture, and property winterization instructions. Never use automotive antifreeze in a plumbing system. If you are unsure which fixtures require protection or how to remove the product safely when the property reopens, use a qualified plumber.
Is It Better to Hire a Plumber or Install a Plumbing System Myself?
If you’re handy, it’s natural to wonder how much of your plumbing installation you can take on yourself. The short answer: you can DIY small jobs, but full system work is usually best left to a pro. And that's because full plumbing pipe installation involves pressure, correct slope, proper venting, code rules, and safety requirements.
Plumbing companies stress that leaks, low water pressure, stains or odors and even fixture upgrades are reasons to “bring in the pros” and warns homeowners not to “wait until a small issue becomes a major repair.”
The installation steps discussed here are meant to give you a clear understanding of how the process works, but they’re not a substitute for professional training or licensed workmanship. For major projects, it’s always best to consult a licensed plumber who can make sure the work is done safely and to code.
Before work begins, confirm who is responsible for the permit, which inspections must occur before piping is covered, what materials and fixtures are included, how changes will be approved, and what the warranty covers. Keep the approved plans, inspection records, test results, product information, and final contract with the property records.
Plumbing Installation FAQs
What is the difference between plumbing system and piping system?
The plumbing system refers to the entire network responsible for water supply and waste removal in a building, including pipes, fixtures, and other components. In contrast, the piping system specifically pertains to the arrangement of pipes that transport water or gas within the plumbing system.
How to tell if you have a closed plumbing system?
A closed water-supply system is one in which a check valve, backflow preventer, pressure-reducing valve, or similar device prevents thermal expansion from pushing water back toward the supply. A PRV or backflow device can be a clue, but confirming the service components is more reliable; closed systems with storage water heaters may require thermal-expansion control under the locally adopted code.
What may be used in a plumbing system to help prevent water supply lines from being contaminated?
Backflow protection can include air gaps, vacuum breakers, dual-check devices, reduced-pressure assemblies, and other approved methods selected for the specific application and hazard. The required method depends on whether the risk involves backsiphonage, backpressure, and the degree of contamination hazard under the locally adopted code.
What is the purpose of a vent pipe in your plumbing system?
A vent pipe in a plumbing system allows sewer gases to escape and lets air enter the system, helping maintain proper atmospheric pressure. This ensures that water and waste can flow smoothly through the drain pipes without creating vacuum conditions that can slow or stop the flow.
Which type of plumbing system collects sewage in underground storage tanks?
A septic system receives household wastewater in a buried watertight tank, where solids settle and wastewater is partially treated. Effluent then flows to a drainfield for further treatment in the soil. It is an onsite wastewater treatment system, not simply an underground storage tank.
Why is the installation of DWV (Drain, Waste, and Vent) systems carefully controlled by plumbing codes?
The installation of DWV systems is carefully controlled by plumbing codes to ensure that they function correctly and safely. Proper installation prevents the risk of sewer gas entering buildings and ensures waste is efficiently removed, preventing blockages and overflows that can lead to health hazards and property damage.
How much does plumbing installation cost?
Plumbing installation cost depends on the project scope, location, foundation and building layout, number of fixtures, pipe materials, labor rates, permits, inspections, and utility connections. New construction, a major remodel, and whole-home repiping are different jobs and should not be compared with one universal per-square-foot figure. For a usable estimate, ask licensed local plumbers for itemized quotes that identify the included fixtures, materials, permit fees, utility work, testing, and warranty terms.
TRADESAFE supplies industrial safety products including Lockout Tagout Devices, Eyewash Stations, and related workplace-safety equipment.
